LEARN KITESURFING - GUIDE FOR YOUR KITE LESSONS
Kitesurfing is a sport that has been around for decades, and it's becoming more and more popular.
It's relatively easy to learn how to kitesurf when you learn with a professional kite school and good instructors, and it can be done anywhere there is water and fairly consistent wind.
In this post, we will cover everything you need to know about the basics of kitesurfing, from what gear you'll need to which safety precautions are necessary and all the small details that will help you in your kitesurfing lessons.
Whether your goal is simply getting out on the water and having fun or becoming an expert kiteboarder, this article will help get you started!
We highly recommend using this information only as a complement to your kite lessons, not as a substitute. You will save a lot of time, money and you'll be a lot safer when you have kitesurf lessons with a professional kite school. In our KITE SCHOOL you can choose the most professional instructors
BEFORE YOUR KITE LESSON
Terminology
Equipment:
Chicken Loop - The loop on the bar that attaches to your harness.
Chicken Finger/Donkey DIck - a hard rubber safety pin/tongue that secures your chicken loop from becoming unhooked.
Depower - The ability to reduce the power of the kite using the trim line or any other depower system.
Leading Edge - The front edge of the kite, that’s where the wind first passes through the kite.
Trailing Edge - Back edge of the kite.
Wind & Positioning
Heel SIde - Edge of the board that is closer to your heels.
Toe Side - Riding toeside is when your toes are pointing towards the water.
Upwind - The direction that the wind is coming from
Downwind - The direction that the wind is coming towards
Zenith - Top of the wind window or 12 o’clock
Underpowered - Not having enough power in the kite
Overpowered - Having too much power in the kite
Sheet out - pushing the bar outwards to reduce power
How to read wind (directions, where to check the forecast, positions downwind/upwind)
Directions
Onshore - This direction is when the wind is blowing straight to the shore. This can be a tricky direction for the beginners as the wind brings you straight to the shore if you fall, so to ride safely you have to get upwind and keep a distance from the shore.
Side Shore - This direction is when the wind is blowing parallel to the shore. This direction is probably the most beginner-friendly as you can safely start from the beach and if you fall you get dragged downwind alongside the shore.
Off Shore - This direction is when the wind is blowing from shore to the water direction. This direction can be dangerous as it can drag you deeper into the water. It’s recommended to kite in this direction only if there is a boat rescue service that could bring you back if something goes wrong.
Positioning according to the wind
Downwind - The direction that the wind is blowing towards. So if you’re facing a downwind direction then the wind is blowing to your back.
Upwind - The direction that the wind is blowing from. So if you’re facing an upwind direction then the wind is blowing to your face.
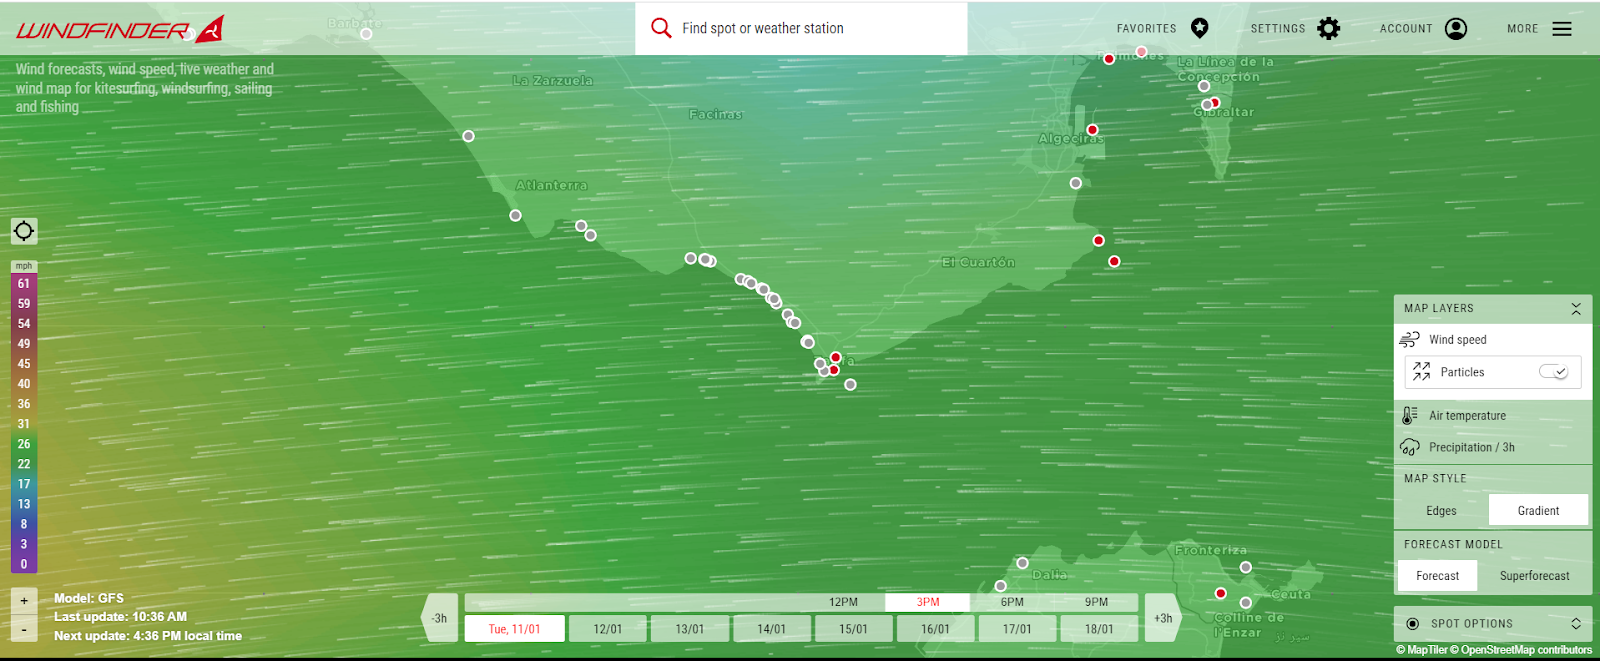
Where to check wind forecasts and how to read them
You can check these sites for your spot forecasts:
To understand these charts you’ll need to look at the wind speed and gust speed, as in the Windguru example you can see the purple color and wind speed up to 40 knots.
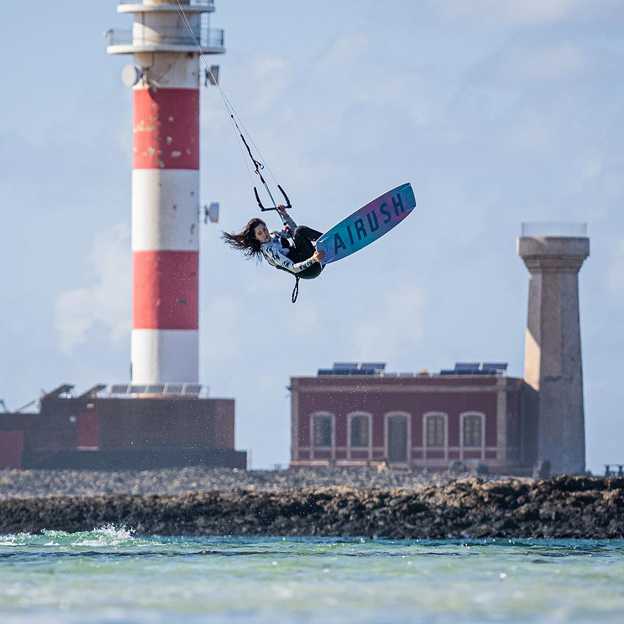
In this wind, a rider that weighs 80kg could ride with a 5-7m kite depending on what board they are using.
Some experienced riders go with 9m kites in this wind, specifically to jump as high as possible, although it can be very dangerous to use that big of a kite in very strong wind as you would have a LOT of power, so it’s not recommended for inexperienced riders to go in such strong wind.
Another important part of the forecast is the wind direction, depending on the spot you’ll need to figure out what wind directions work there, as you don’t want to show up when there is offshore wind unless there are safety boats that operate there in those conditions.
Also on the Windguru site, you have different forecasting/weather models like GFS 13 km, WRF 3 km, and so on, you can check all of these models to make up a pretty good picture of how the conditions will be in the kite spot. They might show slightly different results so the combination of all of them will give you a quite accurate prediction.

Beaufort Scale
|
Force |
Knots |
Km/h |
Mp/h |
Description |
|
0 |
0-1 |
0-1 |
0-1 |
Calm |
|
1 |
1-3 |
1-5 |
1-3 |
Light Air |
|
2 |
4-6 |
6-11 |
4-7 |
Light Breeze |
|
3 |
7-10 |
12-19 |
8-12 |
Gentle Breeze |
|
4 |
11-16 |
20 - 28 |
13-18 |
Moderate Breeze |
|
5 |
17-21 |
29 - 38 |
19-24 |
Fresh Breeze |
|
6 |
22-27 |
39 - 49 |
25-31 |
Strong Breeze |
|
7 |
28-33 |
50 - 61 |
32-38 |
Near Gale |
|
8 |
34-40 |
62 - 74 |
39-46 |
Gale |
|
9 |
41-47 |
75 - 88 |
47-54 |
Severe Gale |
|
10 |
48-55 |
89 - 102 |
55-63 |
Storm |
|
11 |
56-63 |
103 - 117 |
64-72 |
Violent Storm |
|
12 |
64-71 |
118 - 133 |
72-83 |
Hurricane |
Wind window
The wind window is the area where the kite can fly, it’s used to understand how to position your kite to generate power, launch, and do other things. Let’s get into the theory.
Clock system
The positioning of the kite is understood by using hours just like on the clock, and it ranges from 9-3 o’clock, using only the top half of the clock.
12 o'clock is the top (zenith) of the wind window when the kite is directly above you. This position is the starting position for water start and it’s considered a neutral position, where you have less power compared to 1-2 or 10-11 o’clock.
10-11 o’clock are the “working” hours on the left side, and 1-2 o’clock on the right side, these hours are where you position your kite to ride. Also, these hours have more power and drag that helps you to ride.
9 and 3 o’clock will be your launching position, as the kite will be positioned on the ground or water.
Power zones
So the kite can also move in front of you and therefore generate more power.
The edge of the kite window is where your kite has the least amount of power
The lower the kite goes in front of you the more power it will generate, so you have to be very mindful when dropping your kite into the power zone, however, it will be very useful when you get to the water start stage, as it will help you to generate more power to get up from the water.
Trainer kite: Set-up & flying skills
One of the best ways to understand how to fly a kite and practice your flying skills is with a small trainer kite, it will mimic how the big kite will work and you’ll have a better understanding of how to control it.
You can get a training kite here:
When you have the kite and want to play with it, first assess the surrounding area, are there any power lines or any other dangers? Are you close to other people? Make sure that you have a lot of space around you.
To set up the trainer kite, first, you’ll need to unwrap the kite lines in a straight line and place the kite at the end of the lines. Normally you will have a red line or any other color that is different from black/white/grey, which will indicate that this will be the left side of the bar.
So make sure that you connect the red line from the bar to the red line on the kite (left/left) and the other line to the other side.
Disclaimer: Only do this launching method on a small trainer kite, never on a full-size one, as it can be very dangerous.
To launch the kite you’ll need someone to help you, as it’s quite hard to do it yourself. One of the easiest ways is to have your kite completely downwind, meaning that if you stand your back to the wind the kite will be in front of you.
After you launch the kite now you can pull the bar to the sides to control and position the kite where you want. Try to use the wind window theory and use the positions that were mentioned in that section.
Sharpen your board skills (wakeboarding, snowboarding, etc)
Students who have already done some board sports, such as surfing, skateboarding, wakeboarding, snowboarding, etc, tend to get the water start way easier.
So it would be a good idea to go to your local wake park and practice the water start and riding the board, as it would complement your kite lessons as well.
KITESURFING LESSON DAY 1
What equipment do you need to start kitesurfing?
- Kite
- Bar & Lines
- Kiteboard
- Harness with line cutter
- Wetsuit (optional)
- Helmet & buoyancy jacket
Get to know the kite spot
When you’re taking lessons, then your instructor will explain all the details about the kite spot, but if you don’t take lessons then you’ll have to do your research about the spot.
S.E.A. (Spot, Environment, Activity) assessment is a good start.
Spot - Are there any visible hazards like rocks and other objects?
Environment - What is the wind direction and speed? Do tides affect the kite spot? Any other factors like sea breeze?
Activity - Check how many kites are on the water, where are the less busy spots to launch, any beachgoers or sunbathers?
You need to ask locals about hazards that are not visible when you first arrive at the beach. The hazards might be underwater like rocks, reefs, stingrays, or any other hazards on land.
One of the best ways to get to know about the kite spot is to ask locals, they are the best source of knowledge about the kite spot you’re in. They will know all the details regarding where to kite if there are any dangers, and so on.
Read guides, to get to know the spots beforehand.
Assess any dangers when you come to the spot (rocks, etc), check if there are any kites (if there aren’t, ask yourself why) and where you could launch the kite from after you feel that it’s safe to kite there then you can start setting up your kite and go have some fun.
How to choose your kite according to the wind?
A rule of thumb is:
The lighter the wind = Bigger the kite size.
The stronger the wind = Smaller the kite size.
The heavier you are = Bigger the kite size.
To start with on the first day you want to start with the smallest kite possible so that you can learn how to control it without too much power.
As an example, an 80kg rider in 20 knots wind, could choose a 9-12m kite, depending on the board size. With a 12m kite, the rider would be quite overpowered, but still could kite, and with 9m they might be slightly underpowered unless they go with a big board.
Also, the kite size could depend on what kind of board you’re using, so the bigger the board the smaller the kite size you could ride, and vice versa.
Kite with short lines - Set up, using safety systems & kite control
Kite setup
Now you're on your way to set up the kite.
First, you’ll need to take the kite out of the bag and unroll the kite and position yourself so that the wind blows straight to your back.
The unrolled kite should be downwind and then you need to attach the hook from your pump to the kite, so that it doesn’t fly away, and start pumping your kite.
The correct amount of pressure should be written on the kite, which is typically 6-9 psi, if you have a pressure gauge on the kite pump then it would make your life easier to inflate the kite to the correct pressure.
If you don’t have the gauge then you’ll have to constantly check how hard is the kite, one of the best ways to tell that the kite is inflated correctly is by trying to bend the kite, if it’s hard to bend and it shoots up to the normal position when you bend it, then it should be good to go.
After you inflate the kite then you’ll need to “park” it, and flip the kite over, so that the leading edge is on the ground. The middle strut should be facing straight to the wind, and if possible put some sand or other weight to keep the kite down.
From there you can unwind the kite lines and untangle them so that they are straight and place them next to the kite.
Start from the beginning of the bar and run the lines in between your fingers, so that they are separated and untangled from each other.
Now you can connect your lines from all sides of the kite, but it will differ on what side of the bar you will put down.
Just to explain further, if you unwind the lines upwind of the kite then the red side of the bar will be placed on the left, if you have lines downwind of the kite then you’ll have to flip over the bar so that the red side is on the right.
Remember to always connect the lines to the correct pigtails with the same colors, then you will not have any problems.
After you connect the kite lines to the kite, double-check if there are any tangles or twisted lines. The main thing is that the sidelines do not cross over with the middle (Power) lines.
3 Safety systems that you NEED to know before launching the kite
1. Letting go (sheeting out) the bar
Most of the students who just start the lessons are a bit stressed and they tend to pull the bar in, which means more power.
Instead what you need to know is that when you feel too much power, then you need to push out your hands (sheet out) or simply just let go of the bar.
2. Using the quick release
Depending on the manufacturer you will have a quick-release system that you will use to get the kite to depower if you’re in a dangerous situation, e.g twisted lines with another kite, etc.
We will use the Airush IQR system as an example. Simply push out the red quick-release mechanism just above the chicken loop to “activate” the safety system.
From here 99% of the time the quick release will activate and the kite will completely depower.
If this doesn’t work then we will need to go to the last safety system.
3. Releasing the safety leash
If the second method doesn't work and you're still getting pulled, the kite doesn't depower and you see that you are in danger, then you will need to use the last safety system which is releasing the safety leash.
Simply pull the end of the leash where the safety release is located and then you should be detached completely from your kite.
We always say that you can repair or buy new gear, but not bones or even your life. If you have to use it, just do it and keep yourself safe.
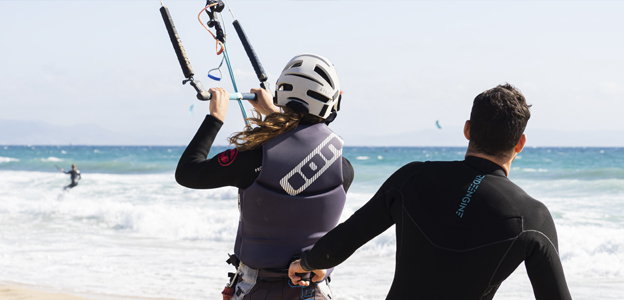
Assisted launch
First, you will need someone to help you with the launch. You will have to position yourself in a straight line from your kite so that you only see one side of the kite.
Think of this if you stand next to the middle of the kite, you have to simply move exactly 90 degrees from the middle strut so that your kite positions itself at 9 or 3 o’clock and your lines are fully stretched out.
Now your assistant should lift the kite, so that the inside of the kite is showing to you, as an example if your kite is at 9 o’clock then your assistant should lift the kite towards the left side.
Now when the kite is up at 9 or 3 you will need to do a pre-flight check, so check if the lines are not tangled and if the kite has the power to launch.
If the lines are in a straight line then start to feel if it has power or not, if there is enough power and the kite is fully stretched and not flappy then it’s ready to fly, if you don’t feel enough power then you’ll have to move a little bit upwind to get some extra power.
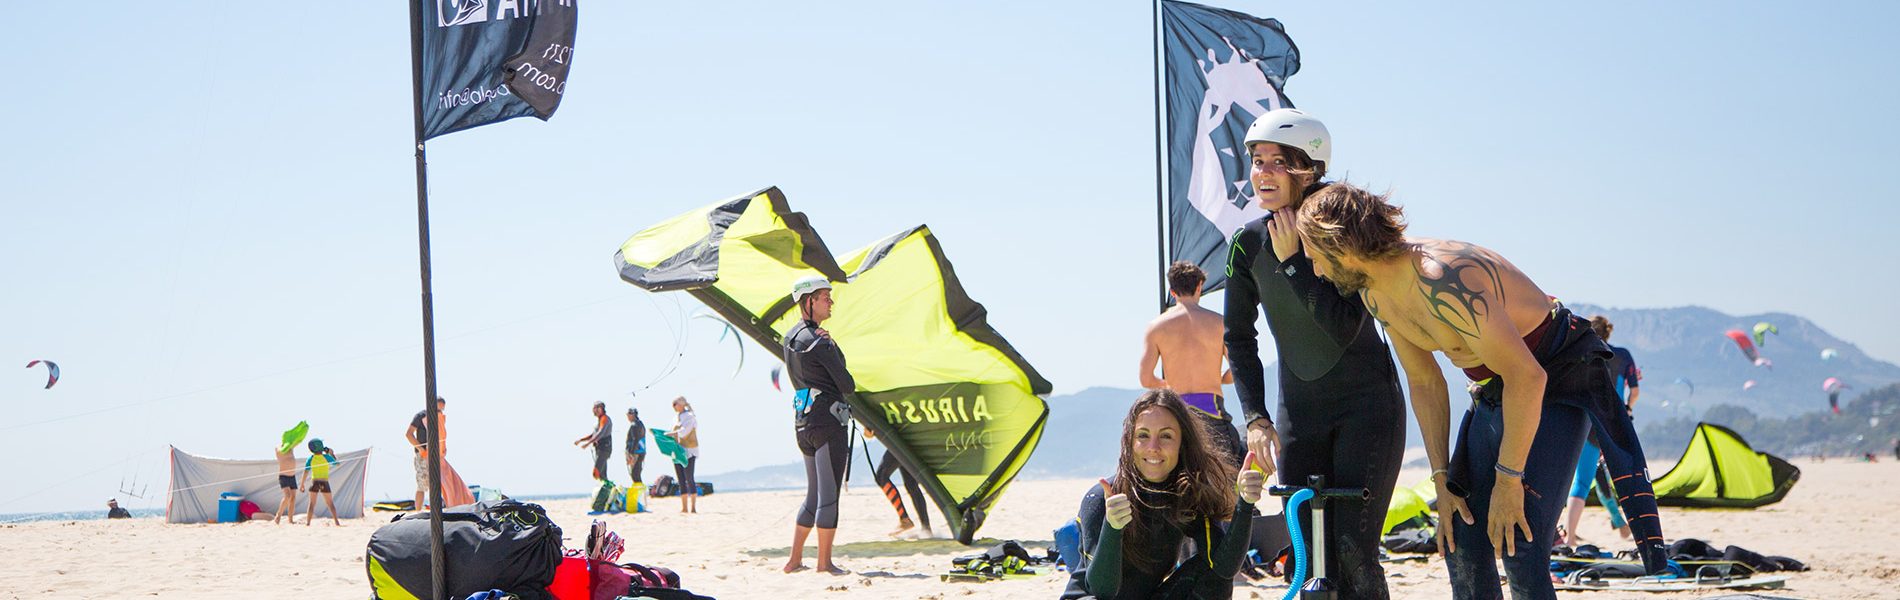
If you feel safe and did the pre-flight check, then you give your partner a thumbs up, so that they can launch it.
At first, try to put the kite to 12 o’clock as slowly as possible, to not get much power, the quicker you go to 12 the more power you’ll generate, so be extra cautious with the launching of the kite.
After you launch, also try to land the kite to your assistant and do this a few times until you get comfortable.
Kite control exercises
After you launch the kite then you can start to move the kite around and do some simple control exercises that will help you with other exercises down the line.
The first one is just to keep your kite at one position, so let’s say you place the kite at 11 o’clock, because it’s on the left side, if you don’t have counter-resistance on the bar it will eventually just fall towards 9, so you have to have to use your right hand to keep a little bit of pressure so that the kite stays on the same spot.
If you go to 2 o’clock then you’ll have to counter the fall with your left hand. Also now you can walk with the kite while keeping only one hand on the bar.
After you master keeping the kite with one hand, now you move the kite more and start generating a little bit of power.
Try to do these exercises while sitting down on the ground, this way you will minimize the risk of injury.
Also, try to play with the bar pressure, and see how your kite reacts when you pull the bar in or sheet out, for these exercises it’s recommended to keep your bar pulled to the middle, but you’ll have to find the best bar pressure position for yourself.
So if you move your kite up and down between 1 and 2 or 10 and 11 you will start to generate power to that side that your kite is on, so let’s say that you are moving the kite from 1 to 2 o’clock constantly, then the kite will pull you towards the right side, this will help you with your water start down the line.
To practice water start (standing up) you will have to start at 12 o’clock and be seated, then depending on which side you want to go, for this example, we will choose to go to the right, you will have to dive your kite from 12 towards 2 o’clock and pull the bar in to generate power and bring back the kite to 1 o’clock, depending on how strong the wind is, you will have to decide how quickly you want to dive the kite towards 2 o’clock.
The stronger the wind you can throw the kite slower as it will have enough power, if the wind is not that strong then you can dive your kite way faster to generate more power or do the movement more times.
When you get all the movements and kite control, now you will have to try out how the safety systems are working, so while keeping your kite at 12 o’clock use the quick release and let the kite drop down and depower. Then you’ll know what to expect when you will use it later on in your kitesurfing journey.
You can also use this to self land the kite, so when you activated the quick release, you will have to pull the kite line that is still attached to the leash and you will have to pull the line itself towards yourself or keep it in tension and get up to the kite to place it in the “parking” position.
Packing your kites
After you finish using the kite gear then you’ll need to store it correctly.
First, disconnect the kite lines and wind them in figure 8 configuration so that it doesn’t unwind and get tangled.
Then flip the kite over, so that the leading edge is facing up and you’re standing with your back to the wind. Now you can deflate the kite and place one of the sides of the kite directly downwind so that you can easily roll it up, roll one side of the kite to the middle and then roll the other side, and fold the rolled up kite in 3 folds that it can easily be placed back in the kite bag.
If the kites are wet then try to roll them out to dry back at home. You can rinse your gear from the salty water from time to time, although it’s not necessary.
KITESURF COURSE DAY 2:
After day 1 now you know how to set up the kite, you understand the wind window and kite positions, and you know how to control the kite.
The next step in kite control is body dragging. Body dragging is great training you do to have better kite control or you're waiting for the wind to pick up.
Body dragging is an exercise where you fly the kite while lying on your belly in the water. You will be holding the bar just like you practiced on the land. To have good control over the kite (steering) and to keep it stable in some positions or move it around to generate power.
Body Dragging
Simple body drag with two hands
Get into the water, check your surroundings to see if it's safe to start, and simply lay on your belly on the water and position your kite towards 1/2 o'clock if you're going to the right and 10/11 o'clock if you're going to the left. Try to keep the kite stable and let it drag you like 50 meters and then switch to the other side.
Figure 8 body drag
Same as above, lay on your belly and now you will have to choose one side you will go.
If you're going to the right then pull your bar in to get more power and move your kite quickly from 12 to 2 and quickly come back to 12 and go again to 2 and try to keep it as a continuous movement.
Aim for 5-10 continuous strokes to one side and then switch sides. Don't do it too much as it will get you downwind very quickly and you'll have to walk back upwind unless you have unlimited space and a boat to pick you up.
Upwind body drag without the board
We highly recommend you focus and learn this exercise to recover your board back, even though it will be a little harder to perform at the beginning.
Again position yourself on your belly in the water and now you will have to place the kite in between 10/11 or 1/2 o’clock and keep it only with one hand and the other hand will be used as a fin to guide you where you want to go.
You should keep your hands, body, and legs in one straight line to prevent getting dragged downwind.
You will have to point your hand around a 30-70 degree angle away from the kite, because if you go towards the kite then you’ll be dragged downwind, and if you point your hand too high upwind then you will stop yourself and get dragged eventually downwind.
Another good tip is to try to pick a marker on the beach or in the direction you’re going and point your hand to it when the kite is dragging you.
Upwind body drag with the board
Now this will be the same as the previous body dragging exercise, just with the board in hand. This can be used to come back to the beach or go over a beach break and waves.
Why do we do it?
We do these body drag exercises to get better at kite control and prepare ourselves for the waterstart phase, which is difficult at the beginning as you will have to combine all the kite control skills and add board skills to it.
The more time you spend on body dragging the easier will be on the next phase which is waterstart.
The upwind body drag is mainly used to get your board back after you lose it after crashing, especially in deep water where you cannot walk back to catch your board.
Common mistakes
- Crashing the kite - you’ll have to relaunch the kite and it will make you drift downwind
- Trying to go too much upwind - will cause extra drag and eventually, you will get downwind
- Going too much downwind - will make it hard to recover your board
- Flipping to your back - unstable position for body dragging
- Trying to kick or swim with your hands - will cause extra unnecessary drag
Self-rescue
Self-rescue is one of the most important skills to have, and it’s recommended to spend time to get it right, as it might save you in stressful situations when you need to use it.
First, you’ll have to use the quick release to depower your kite.
Then you will need to grab your bar and start winding the lines, at first roll up the line (depower line) that is connected to the leash, secure it by passing the last bit through the hole in between the floatie, and bar.
When you secured the depower line, now you can roll up all the other lines, it can be done in typical figure 8 or just roll the lines over the bar, which is quicker in this situation but it can make a lot of tangles and you’ll need to spend some time to untangle the “spaghetti”.
So now you rolled up the bar and ended up next to your kite, if the kite is on the leading edge then you will need to flip it over, it can be quite difficult to do it when you’re in deep water.
The easiest way is to come to the side of the kite so that you can fold the end of the leading edge to flip the kite over.
Now check where you want to go back to the beach, if you want to go to the right then you need to grab the right side bridle and pull it and position yourself on the other side of the kite so that you make a sail out of your kite.
From here you will catch the wind and will get dragged back to the direction your kite is pointing.
Be careful not to get tangled in the lines, in case that happens and the kite starts to power up and drags you, you must use the line cutter to free yourself.
Water Relaunch
Another essential skill to master is to relaunch the kite when you crash it into the water. We will look at different ways to get the kite up depending if you have a 4 line or 5 line bar.
4 Line Bar
So when the kite crashes right in front of you on its leading-edge, then you need to completely sheet out the bar and pull only on one sideline, as an example, if you pull the red line then the kite will position towards 3 o’clock and when it positions there then the kite needs to be put on its side, when it reaches the launching position then slowly lift the kite towards 12 o’clock.
A common mistake on this step with the beginners is that they pull the bar too much and the kite falls on its trailing edge, to avoid this mistake try to get the kite up slowly to the air.
5 Line Bar
With a 5 line bar, the water relaunch is a little bit different than with the 4 line bar.
So when the kite is in front of you on its leading-edge, you will need to pull the 5th line so the kite falls slightly backward on the canopy, from this position you can pull one of the sidelines so that the kite ends up in the launching position on its side.
When it reaches the side you can release the 5th line then and you go through the standard procedure of lifting the kite slowly, just like launching from the beach.
OUR KITE SCHOOL'S DAY 3 LESSON:
Waterstart
So now that you learned the kite control, now it's time to put all the parts together and start to do a water start.
You have to go to the water with your kite and board and keep a safe distance between you and other kiters.
The rule of thumb is that you should keep at least double the length of your kite lines in front of you (downwind), and one length of the kite lines from either side and upwind of you.
Depending on the direction of the wind, get to a safe distance from the shore, especially if it's onshore wind.
Now you have to put the board on your feet, try to keep the kite at 12 o'clock and get your feet into the straps.
I always tell my students to try to keep the kite, the bar, and the board in one parallel line for the start, because if you start spinning around with the board and misalign it will be way harder to water start.
After you have a good starting position now it's time to make a power stroke with your kite, meaning that you have to throw your kite from 12 o'clock to 2 o'clock if you're starting to the right side or 10 o'clock if you're starting to the left.
If the wind conditions are good then one stroke should be enough to get you out of the water, if it's lighter then you would need to continuously make the power stroke to generate enough power to get you going.
Because of the power stroke, you will get pulled towards the side where you threw your kite, so you will need to counterbalance the pull of the kite and lean slightly back.
A very common beginner mistake is keeping the center of balance too in front of the board, so they get pulled over the board because of the power of the kite pull.
As mentioned previously to counter that you will need to keep your center of gravity directly over the board and lean backward, but not too much, as it could stop you.
Another very important thing is the positioning of the board. To start when you throw the kite towards 2 o’clock then point your board towards the kite to get some speed and go downwind.
After you get out of the water and are riding, then try to position your board crosswind or even upwind, so that you don’t go too much downwind.
ROW - Right of way rules
Anyone who has the right of way can pass the other riders more upwind and while keeping the kite higher, the other rider has to lower their kite to let you through.
Although sometimes people don’t follow the rules and sometimes you’ll have to lower the kite to pass each other safely.
The kitesurfer entering the water has the right of way over the kitesurfer who is coming back to the beach.
The Starboard side (Going to right) rider has the right of way against the port side (Going to left) rider.
The kitesurfer who is more upwind has the right of way and should keep the kite up and the downwind rider should keep their kite down.
Anyone who is riding the wave has the right of way.
FAQs
What kite size should I use for my first kitesurfing lesson?
Well, it depends on the wind conditions. The smaller the kite the less power it will generate which will make it safer for your kite lesson, but if it is too small then it might not have enough power to keep in the air and it will crash all the time.
Why should I also wear a life jacket while kitesurfing when there are no waves or current at all?
Safety first always. Even if you’re not in deep water you should wear a life jacket as it will act as an impact vest and will make your crashes softer. But also it will help you float better if you’re in deep water practicing kitesurfing.
How to choose a good kitesurfing school?
Quick tips:
- Read reviews
- Check for licensed instructors, who have good experience in teaching
- Do they have no wind guarantees and so on?
- Is the school insured?
- Do they use safety equipment?
If you want to learn more about it, read it here
Who gives lessons and where can I find them?
There are a lot of kite schools all over the world that you can choose from. So if you’re going to a place that has a beach, most likely that they will have a kite school down there. Otherwise, you can check this list https://www.iksurfmag.com/schools/ or just simply Google “kite school in [place you’re going]“
Where can I buy a kite in Europe and how much does it cost to buy one online vs. locally?
There are many kite shops online, you can find good deals at our online kite shop. Buying locally can be beneficial as you could get a better deal although it could take more time rather than buying online.